Discover how to set up a Visual Studio coding environment and write a C# program in this tutorial. Additionally, you will learn how to parse JSON output and connect to a WebSocket service (in this example, Tradermade's Forex data feed) to obtain streaming data (forex, CFD, and cryptocurrency) in real-time.
You can skip to the coding section if you have experience setting up Visual Studio. The documentation area of the website C# WebSocket Example offers a copy of the code that has already been pre-filled with your API key for download. Although only a few currencies are covered in this tutorial, TraderMade provides WebSocket with more than 1500 currency pairs.
Create the development environment.
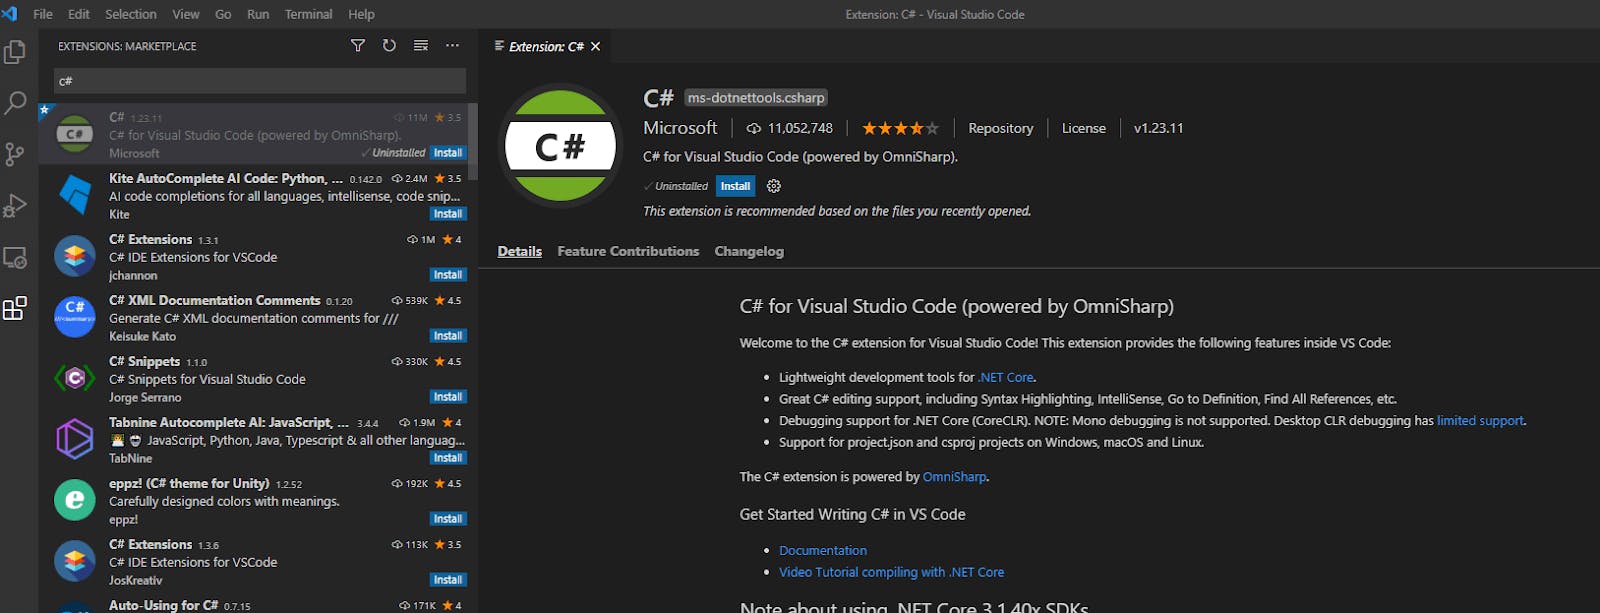
Download and install the.NET Core SDK and Visual Studio Code from https://code.visualstudio.com/download. Install and configure the C# extension in VS Code. Open Visual Studio Code and type C# in the search box under View -> Extension. There are other extension choices, but for this code, for instance, choose the OmniSharp option and click the install button.

Organize the project
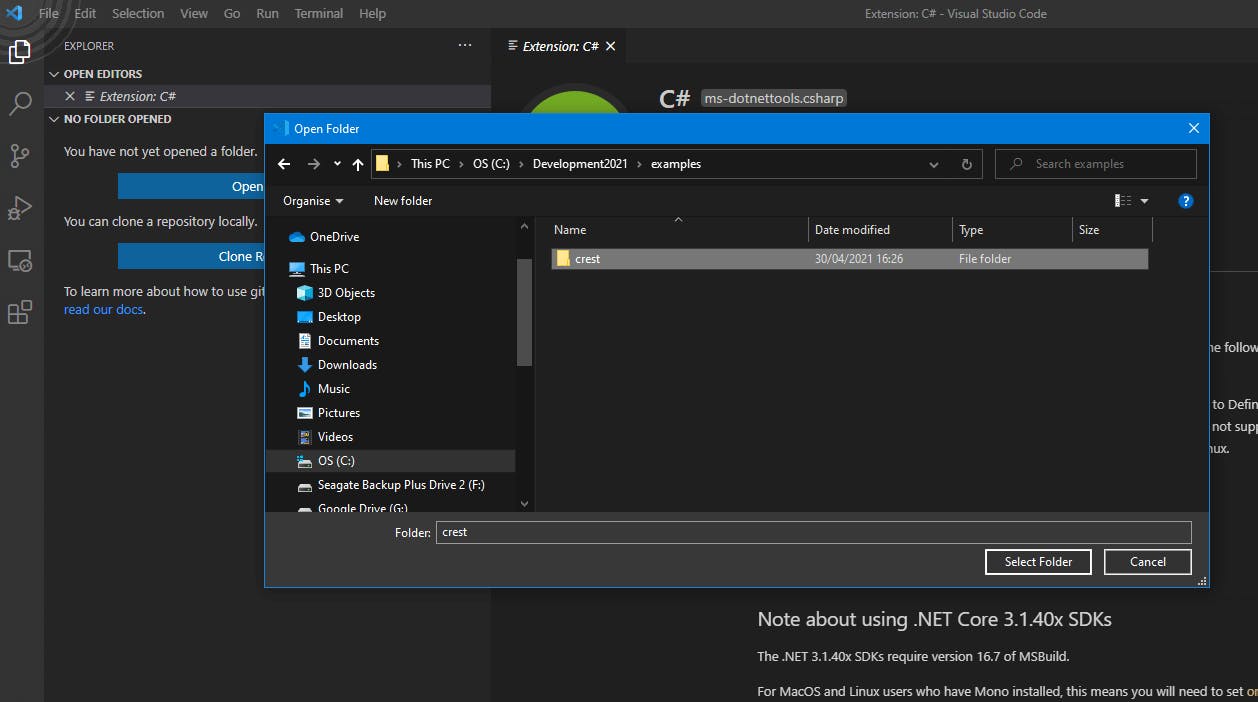
Let us build the project to connect to the WebSocket. Create a new directory in Windows Explorer. You can give it whatever name you wish, but for this example, we will use csWebsocket as it is a C# WebSocket example. Open VSCode now, choose: File -> Open Folder, and then pick the newly created folder.

As the folder is open in VSCode, we must build the .net skeleton. This will establish the project specification file (.csproj) and the main file (.cs), into which we will paste our code.
Enter the following command after choosing View > Terminal.
Dotnet new console
The project will automatically include a “Hello World” sample. If you are asked to download any more files required by the software, choose “Yes.” Just press CTRL+SHIFT+X to get a prompt if you did not get one.

Put in the NuGet
NuGet must be installed using the package manager. To do this, choose the extension tab, type NuGet into the search box, and then click Install. The JSON sent via WebSocket can be parsed with the aid of the NuGet library.

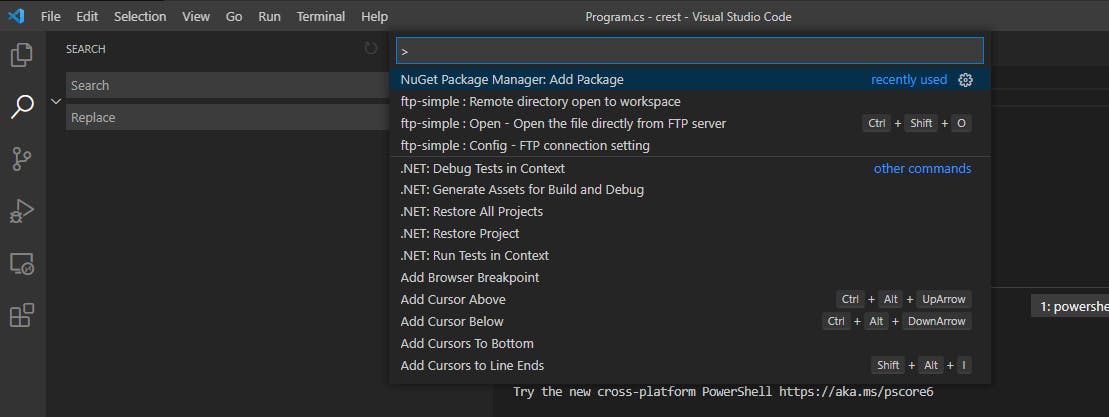
We can install our assistance libraries once the NuGet package management has been installed. To display the VS Command Palette, press ***“***F1” (or FN + F1 on Windows). First, enter “NuGet” and then select “NuGet Package Manager Add Package.”

To choose the appropriate package and the most recent version at the top, we will type “Newtonsoft.JSON” into the subsequent search box and hit enter.

Repeat the previous steps to launch the NuGet package manager, then type “Websocket.Client” into the search bar to get the most recent version. Next, let us install the WebSocket helper libraries.

Obtain your API key
Now, as the environment is ready, let us obtain your TraderMade API Key. If you do not already have an account, you can create one here in a matter of seconds, and after logging in, you can copy your key from your dashboard.
The exciting part is about to begin. Let us start coding!
The WebSocket.Client (which aids in obtaining WebSocket assistance libraries) and the Newtonsoft.Json import statements will be added in the beginning. The first two are system-required libraries (this will help us parse the JSON data).
using System;
using System.Threading;
using Websocket.Client;
using Newtonsoft.Json;
The namespace is set so that we do not have any incompatible classes. Next, we define the namespace “csWebsocket” and the class “Program” within it. Do not forget to add your personal API key when we initialize the variable “streaming API Key” in the class Program at the beginning of the program.
Then, as you can see from the code below, we will set the Main method to be “static void Main(string[] args).” The function “void” is used when it does not have a return type, and we are using it to launch the second function, “Initialize.”
namespace csWebsocket
{
class Program
{
private string streaming_API_Key = "your_api_key";
static void Main(string[] args)
{
Program prg = new Program();
prg.Initialize();
}
private void Initialize()
{
Console.CursorVisible = false;
Console.ReadKey();
}
}
}
After the fundamental framework is complete, we will define our handler code within the Initialize method. Once these are configured, we will construct a new WebSocket class and inject the “url” in. The ***“***exitEvent” and “url” variables are simple to grasp. When setting one or more resources, the “using” statement is used. As indicated below, the resources are used and released.
As the WebSocket requires the user to log in, we set the ReconnectTimeout to 30 seconds, after which the socket connection messages will be received via the MessageReceived function. We then listen for a connected message and send back a JSON with the user key and the symbols we need using the client. the Send() method.
try
{
var exitEvent = new ManualResetEvent(false);
var url = new Uri("wss://marketdata.tradermade.com/feedadv");
using (var client = new WebsocketClient(url))
{
client.ReconnectTimeout = TimeSpan.FromSeconds(30);
client.ReconnectionHappened.Subscribe(info =>
{
Console.WriteLine("Reconnection happened, type: " + info.Type);
});
client.MessageReceived.Subscribe(msg =>
{
Console.WriteLine("Message received: " + msg);
if (msg.ToString().ToLower() == "connected")
{
string data = "{"userKey":"" + streaming_API_Key + "", "symbol":"EURUSD,GBPUSD,USDJPY"}";
client.Send(data);
}
});
client.Start();
//Task.Run(() => client.Send("{ message }"));
exitEvent.WaitOne();
}
}
catch (Exception ex)
{
Console.WriteLine("ERROR: " + ex.ToString());
}
You will need to paste your API key into the below code to connect to the WebSocket and subscribe to a few symbols. The complete code is given below:
using System;
using System.Threading;
using Websocket.Client;
using Newtonsoft.Json;
namespace TraderMadeWebSocketTest
{
class Program
{
private string streaming_API_Key = "YOUR_USER_KEY";
static void Main(string[] args)
{
Program prg = new Program();
prg.Initialize();
}
private void Initialize()
{
Console.CursorVisible = false;
try
{
var exitEvent = new ManualResetEvent(false);
var url = new Uri("wss://marketdata.tradermade.com/feedadv");
using (var client = new WebsocketClient(url))
{
client.ReconnectTimeout = TimeSpan.FromSeconds(30);
client.ReconnectionHappened.Subscribe(info =>
{
Console.WriteLine("Reconnection happened, type: " + info.Type);
});
client.MessageReceived.Subscribe(msg =>
{
Console.WriteLine("Message received: " + msg);
if (msg.ToString().ToLower() == "connected")
{
string data = "{"userKey":"" + streaming_API_Key + "", "symbol":"EURUSD,GBPUSD,USDJPY"}";
client.Send(data);
}
});
client.Start();
//Task.Run(() => client.Send("{ message }"));
exitEvent.WaitOne();
}
}
catch (Exception ex)
{
Console.WriteLine("ERROR: " + ex.ToString());
}
Console.ReadKey();
}
}
}
Now, write the following command in VSCode to run your code:
dotnet run .csWebsocket.cs
And that is it! Now, prices are arriving at your terminal through the Websocket in a flash.
Message received: {"symbol":"EURUSD","ts":"1636114682174","bid":1.15371,"ask":1.15372,"mid":1.153715}
Message received: {"symbol":"EURUSD","ts":"1636114682202","bid":1.15371,"ask":1.15371,"mid":1.15371}
Message received: {"symbol":"USDJPY","ts":"1636114682278","bid":113.787,"ask":113.788,"mid":113.787506}
Message received: {"symbol":"USDJPY","ts":"1636114682363","bid":113.788,"ask":113.788,"mid":113.788}
Message received: {"symbol":"USDJPY","ts":"1636114682420","bid":113.788,"ask":113.789,"mid":113.7885}
Message received: {"symbol":"USDJPY","ts":"1636114682488","bid":113.789,"ask":113.789,"mid":113.789}
Message received: {"symbol":"USDJPY","ts":"1636114682632","bid":113.788,"ask":113.789,"mid":113.7885}
Message received: {"symbol":"EURUSD","ts":"1636114682635","bid":1.15371,"ask":1.15372,"mid":1.153715}
Message received: {"symbol":"EURUSD","ts":"1636114682643","bid":1.15372,"ask":1.15372,"mid":1.15372}
Message received: {"symbol":"EURUSD","ts":"1636114682682","bid":1.15373,"ask":1.15373,"mid":1.15373}
Message received: {"symbol":"EURUSD","ts":"1636114682768","bid":1.15372,"ask":1.15372,"mid":1.15372}
Message received: {"symbol":"USDJPY","ts":"1636114683727","bid":113.789,"ask":113.789,"mid":113.789}
Segmenting the data
Since we now have the data, we can parse it and extract the information we need. We develop a quotation class that contains the structure of the messages arriving via WebSocket. After the libraries and before the namespace, paste a copy at the top of the page.
public class quote
{
public string symbol { get; set; }
public long ts { get; set; }
public double bid { get; set; }
public double ask { get; set; }
public double mid { get; set; }
}
Then, as shown below, we add the parsing code as an else statement to our program. We use the DeserializeObject to parse the data into the class, and after that, we can directly access the class properties, like the result.symbol and result.bid.
client.MessageReceived.Subscribe(msg =>
{
Console.WriteLine("Message received: " + msg);
if (msg.ToString().ToLower() == "connected")
{
string data = "{"userKey":"" + streaming_API_Key + "", "symbol":"EURUSD,GBPUSD,USDJPY"}";
client.Send(data);
}
else {
string data = msg.Text;
var result = JsonConvert.DeserializeObject<quote>(data);
Console.WriteLine(result.symbol + " " +result.bid+ " " + result.ask);
}
});
When we execute the program, we should see the raw input and the parsed output.
Message received: {"symbol":"USDJPY","ts":"1636117095648","bid":113.888,"ask":113.889,"mid":113.888504}
USDJPY 113.888 result 113.889
Message received: {"symbol":"USDJPY","ts":"1636117095653","bid":113.889,"ask":113.889,"mid":113.889}
USDJPY 113.889 result 113.889
Message received: {"symbol":"GBPUSD","ts":"1636117095658","bid":1.34458,"ask":1.3446,"mid":1.34459}
GBPUSD 1.34458 result 1.3446
Message received: {"symbol":"EURUSD","ts":"1636117095660","bid":1.15192,"ask":1.15192,"mid":1.15192}
EURUSD 1.15192 result 1.15192
Then we're done. The sample FX real-time data with c# WebSocket is already operational. The complete code is available on our GitHub page.
If you have a suggestion or need assistance getting started, do get in touch with us. We always want to hear from you and are willing to assist you.
Also, go through the original tutorial published on the TraderMade website:
Real-Time Forex, CFD, and Crypto WebSocket with C#
Also, refer to other technical tutorials based on C#:
